Thursday, August 27, 2009

Custom Welcome User message in SharePoint

By-default SharePoint display Logged-in user name as --- Welcome UserName,
also its displays a context menu on mouse click which performs following actions:
a) Personal Settings
b) Sign Out
c) Sign in as different user, etc

We can add / delete menu items in Welcome User's context menu.

Now consider a scenarion where we don't want context menu, just User name and Sign-Out link are needed.

To acheive above requirement, we can either create a custom WebPart or a custom UserControl.
I preferred custom UserControl, because it easy to create and deploy.

Following is the code snippet of custom UserControl (name MyWelcomeUser.ascx) -


<%@ Control Language="C#" AutoEventWireup="true" CompilationMode="Always"
EnableViewState="true" %>

<div id="divMain" runat="server" style="width: 100%;">
<table cellpadding="0" cellspacing="0">
<tr class="column_title_link tab-bg">
<td class="welcome-text">
Welcome
<asp:Label ID="LabelUserName" runat="server"
Style="padding-left: 5px; font-weight: bold;"></asp:Label>
</td>
<td>
|
</td>
<td>
<asp:HyperLink NavigateUrl="/_layouts/signout.aspx"
ID="HyperLinkSignOut" runat="server"
Text="Logout"></asp:HyperLink>
</td>
</tr>
</table>
</div>

<script language="C#" runat="server">

protected void Page_Load(Object sender, EventArgs e)
{
LabelUserName.Text = Microsoft.SharePoint.SPContext.Current.Web.CurrentUser.Name;
}

</script>


In the above code snippet I created a Label, whose text is set to current logged-in user in Page_Load event and a link to do Sign Out.
Here I am using SharePoint's default signout page.


Following is the snapshot of custom Login control...

SPSiteDataQuery in SharePoint

If we want to search some record(s) within a SPList, then SPQuery is sufficient.

But consider a scenarion, where we don't know SPList name or we want to fire a query at SPWeb (Site) level, then we have to use SPSiteDataQuery.

Syntax wise SPSiteDataQuery is same as SPQuery.
Following code snippet gives a rough idea about SPSiteDataQuery usage:


SPWeb oWebsite = SPContext.Current.Web;
SPSiteDataQuery oQuery = new SPSiteDataQuery();

string s1 = "avinash";
string s2 = "IsAdmin";

StringBuilder strb = new StringBuilder();
strb.Append("<Where><And>");
strb.AppendFormat("<Eq><FieldRef Name='LoginName' /><Value Type='Text'>{0}</Value></Eq>", s1);
strb.AppendFormat("<Eq><FieldRef Name='{0}' /><Value Type='Boolean'>1</Value></Eq>", s2);
strb.Append("</And></Where>");

oQuery.Query = strb.ToString();
oQuery.Lists = "<Lists ServerTemplate=\"100\" />";
//oQuery.ViewFields = "<FieldRef Name=\"Title\" />";

DataTable dtResults = oWebsite.GetSiteData(oQuery);

if(dtResults.Rows.Count > 0)
{
//There are some records


//dtResults.Columns.Count --- 3 --- data type : int

//dtResults.Columns[0].ColumnName --- "ListId" --- data type : string
//dtResults.Columns[1].ColumnName --- "WebId" --- data type : string
//dtResults.Columns[2].ColumnName --- "ID" --- data type : string


//In case of 1 record found
//dtResults.Rows.Count --- 1 --- data type : int

//dtResults.Rows[0][0] --- "{some GUID value}" --- data type : object {string}
//dtResults.Rows[0][1] --- "{some GUID value}" --- data type : object {string}
//dtResults.Rows[0][2] --- "6" --- data type : object {string}


//To open the SPList that contains our desired record:
string stringGuid
= dtResults.Rows[0][0].ToString().Replace("{", "").Replace("}", "");
Guid guidObject = new Guid(stringGuid);
SPList spList = oWebsite.Lists[guidObject];
}
else
{
//There is no record
}


In the above code I am looking for record that contains LoginName (SPColumn name) as "avinash" and IsAdmin (SPColumn name) is set to true.


Quick re-cap:
1) Open SPWeb
2) Build query
3) Create SPSiteDataQuery object
4) Set following properties of SPSiteDataQuery's object -
a) Query
b) Lists
c) ViewFields
5) Get DataTable by executing query on SPWeb
6) Check number of Rows in DataTable
7) If record(s) found, then get GUID of SPList
8) Get SPList based on GUID
9) Do required operation on SPList


Following are the ServerTemplate IDs for List:


100 Generic list, 101 Document library, 102 Survey, 103 Links list, 104 Announcements list, 105 Contacts list, 106 Events list, 107 Tasks list, 108 Discussion board, 109 Picture library, 110 Data sources, 111 Site template gallery, 112 User Information list, 113 Web Part gallery, 114 List template gallery, 115 XML Form library, 116 Master pages gallery, 117 No-Code Workflows, 118 Custom Workflow Process, 119 Wiki Page library, 120 Custom grid for a list, 130 Data Connection library, 140 Workflow History, 150 Gantt Tasks list, 200 Meeting Series list, 201 Meeting Agenda list, 202 Meeting Attendees list, 204 Meeting Decisions list, 207 Meeting Objectives list, 210 Meeting text box, 211 Meeting Things To Bring list, 212 Meeting Workspace Pages list, 300 Portal Sites list, 301 Blog Posts list, 302 Blog Comments list, 303 Blog Categories list, 850 Page Library, 1100 Issue tracking, 1200 Administrator tasks list, 2002 Personal document library, 2003 Private document library


Reference Links:

Server Template Numbers
SPSiteDataQuery 1
SPSiteDataQuery 1
SPSiteDataQuery 1

Saturday, August 8, 2009

Configuring Forms Based Authentication (FBA) in SharePoint


If we want to configure Forms Based Authentication (FBA) in SharePoint,
then we have to follow following steps -

Configuration Steps:
1) Setup the membership data store.
2) Create an ASP.Net Web Site to manage Roles and Users.
3) Open ASP.Net Web Site’s Web Administration Tool.
4) Create a new Web Application from SharePoint Central Administration site.
5) Extend Web Application
6) Change Authentication Provider for Forms based site.
7) Change configuration files settings.
8) Change policy for Web Application
9) Add users/roles as site administrator (Primary and Secondary).
10) Check Forms Based Authentication


Now I will explain each steps in some detail -


1) Setup the membership data store.

To create database, Microsoft has provided a tool/ utility called aspnet_regsql.exe that creates a database for us.
This utility can be found in
%windir%\Microsoft.Net\Framework\vx.x.xxxxx folder.

Double click or run aspnet_regsql.exe,
it opens a pop-up window as demonstrated in following images :


[Figure - 1]


[Figure - 2]


[Figure - 3]
Note: Enter your Server Name and Database name in fields.


[Figure - 4]


[Figure - 5]


[Figure - 6]


Note: Check whether your custom MembershipDB is accessible by NT AUTHORITY\ NETWORK SERVICE or not.

Steps:
a) Open MS SQL Server Management Studio
b) Select SERVER (in Tree-node at left side)
c) Select Security
d) Select Logins
e) Select NT AUTHORITY\NETWORK SERVICE
f) Right-click on it, select Properties
g) Its pop-ups Login Properties window.
Select User Mapping (in Tree-node at left side)
h) Check your database name in top-right pane and
its corresponding access in bottom-right pane.
i) Click OK.
j) Then to check effective permissions of your custom MembershipDB,
select DB from left side tree view.
Server – Databases – custom MembershipDB
k) Right-click on custom MembershipDB, select Properties.
l) In Database Properties window, select Permission
(in left pane).
m) Select NT AUTHORITY\NETWORK SERVICE (in right pane),
click Effective Permissions button.
n) Check whether it has required permissions or not.
If not then assign required permissions.


2) Create a new ASP.Net Web Site to manage Roles and Users.

Do following changes in temporary ASP.Net web site's configuration file:

Web site’s configuration file (web.config) ---


<configuration>
<!--Remaining settings-->

<connectionStrings>
<add name="CustomMembershipDBCNX"
connectionString="SERVER=Server-Name; DATABASE=CustomMembershipDB;
TRUSTED_CONNECTION=true;"
providerName="System.Data.SqlClient" />
</connectionStrings>

<system.web>
<!--Remaining settings-->

<machineKey validationKey="Copy-it-from-sharepoint-site-cofig-file"
decryptionKey="Copy-it-from-sharepoint-site-cofig-file"
validation="SHA1" />

<authentication mode="Forms">
<forms loginUrl="/_layouts/login.aspx" />
</authentication>

<membership defaultProvider="CustomMembershipProvider">
<providers>
<add name="CustomMembershipProvider"
type="System.Web.Security.SqlMembershipProvider, System.Web,
Version=2.0.0.0, Culture=neutral, PublicKeyToken=b03f5f7f11d50a3a"
connectionStringName="CustomMembershipDBCNX"
enablePasswordRetrieval="false"
enablePasswordReset="true"
requiresQuestionAndAnswer="false"
applicationName="/"
requiresUniqueEmail="false"
passwordFormat="Hashed"
maxInvalidPasswordAttempts="5"
minRequiredPasswordLength="7"
minRequiredNonalphanumericCharacters="1"
passwordAttemptWindow="10"
passwordStrengthRegularExpression=""
/>
</providers>
</membership>

<roleManager enabled="true" defaultProvider="CustomRoleProvider">
<providers>
<add name="CustomRoleProvider"
connectionStringName="CustomMembershipDBCNX"
applicationName="/"
type="System.Web.Security.SqlRoleProvider, System.Web,
Version=2.0.0.0, Culture=neutral, PublicKeyToken=b03f5f7f11d50a3a"
/>
</providers>
</roleManager>
</system.web>
</configuration>


Changed following 4 settings in above snippet (quick review):
a) connectionStrings
b) machineKey
c) authentication
d) membership
e) roleManager


3) Open ASP.Net Web Site’s Web Administration Tool

Go To ---
Menu -> Website -> ASP.Net Configuration


[Figure - 7]


a) Security tab: To manage/create Roles and User
b) Provider tab: To test both Custom membership and role provider
(click Select a different provider for each feature (advanced) link).


4) Create a new Web Application from SharePoint Central Administration site

Step:

Central Administration > Application Management >
Create or Extend Web Application > Create New Web Application

After creating the Web Application create Site Collection (link gets displayed after completing the above step)


5) Extend Web Application

Note: Select proper site (from top-right dropdown) that you want to extend.
Step:

Central Administration > Application Management > Create or Extend Web Application > Extend Web Application to Another IIS Web Site

In above step/page select Zone as Extranet or Internet as per your requirement.


6) Change Authentication Provider for Forms based site

Note: Select proper site and zone (from top-right dropdown) whose Authentication Provider you want to change to Forms Based.

Step:

Central Administration > Application Management > Authentication Providers > Edit Authentication

a) Select Authentication Type as Forms.
b) Disable Anonymous access
c) Enter custom Membership provider name
d) Enter custom Role manager name

Save the changes.


7) Change configuration files settings

Changes required in SharePoint Central Administration configuration file (web.config).

IMPORTANT: Do take the back-up of web.config file.


<configuration>
<SharePoint>
<!--Remaining settings-->

<PeoplePickerWildcards>
<clear />
<add key="AspNetSqlMembershipProvider" value="%" />
<add key="CustomMembershipProvider" value="%" />
</PeoplePickerWildcards>

</SharePoint>
<!--Remaining settings-->

<connectionStrings>
<add name="CustomMembershipDBCNX"
connectionString="SERVER=Server-Name; DATABASE=CustomMembershipDB;
TRUSTED_CONNECTION=true;"
providerName="System.Data.SqlClient" />
</connectionStrings>

<system.web>
<!--Remaining settings-->

<membership>
<providers>
<add name="CustomMembershipProvider"
type="System.Web.Security.SqlMembershipProvider, System.Web,
Version=2.0.0.0, Culture=neutral, PublicKeyToken=b03f5f7f11d50a3a"
connectionStringName="CustomMembershipDBCNX"
enablePasswordRetrieval="false"
enablePasswordReset="true"
requiresQuestionAndAnswer="false"
applicationName="/"
requiresUniqueEmail="false"
passwordFormat="Hashed"
maxInvalidPasswordAttempts="5"
minRequiredPasswordLength="7"
minRequiredNonalphanumericCharacters="1"
passwordAttemptWindow="10"
passwordStrengthRegularExpression=""
/>
</providers>
</membership>

<roleManager enabled="true" defaultProvider="AspNetWindowsTokenRoleProvider">
<providers>
<add name="CustomRoleProvider"
connectionStringName="CustomMembershipDBCNX"
applicationName="/"
type="System.Web.Security.SqlRoleProvider, System.Web,
Version=2.0.0.0, Culture=neutral, PublicKeyToken=b03f5f7f11d50a3a"
/>
</providers>
</roleManager>
</system.web>
</configuration>


Changed following 4 settings in above snippet (quick review):
a) PeoplePickerWildcards – To detect your custom provider
b) connectionStrings
c) membership – Don’t specify default provider
d) roleManager – Change default provider to AspNetWindowsTokenRoleProvider

Note : Don’t change MachineKey.


Now made following changes in SharePoint Web Application's (created in step 4) configuration file (default one with Windows authentication) (web.config)


<configuration>
<SharePoint>
<!--Remaining settings-->

<PeoplePickerWildcards>
<clear />
<add key="AspNetSqlMembershipProvider" value="%" />
<add key="CustomMembershipProvider" value="%" />
</PeoplePickerWildcards>

</SharePoint>
<!--Remaining settings-->

<connectionStrings>
<add name="CustomMembershipDBCNX"
connectionString="SERVER=Server-Name; DATABASE=CustomMembershipDB;
TRUSTED_CONNECTION=true;"
providerName="System.Data.SqlClient" />
</connectionStrings>

<system.web>
<!--Remaining settings-->

<membership defaultProvider="CustomMembershipProvider">
<providers>
<add name="CustomMembershipProvider"
type="System.Web.Security.SqlMembershipProvider, System.Web,
Version=2.0.0.0, Culture=neutral, PublicKeyToken=b03f5f7f11d50a3a"
connectionStringName="CustomMembershipDBCNX"
enablePasswordRetrieval="false"
enablePasswordReset="true"
requiresQuestionAndAnswer="false"
applicationName="/"
requiresUniqueEmail="false"
passwordFormat="Hashed"
maxInvalidPasswordAttempts="5"
minRequiredPasswordLength="7"
minRequiredNonalphanumericCharacters="1"
passwordAttemptWindow="10"
passwordStrengthRegularExpression=""
/>
</providers>
</membership>

<roleManager enabled="true" defaultProvider="CustomRoleProvider">
<providers>
<add name="CustomRoleProvider"
connectionStringName="CustomMembershipDBCNX"
applicationName="/"
type="System.Web.Security.SqlRoleProvider, System.Web,
Version=2.0.0.0, Culture=neutral, PublicKeyToken=b03f5f7f11d50a3a"
/>
</providers>
</roleManager>
</system.web>
</configuration>


Changed following 4 settings in above snippet (quick review):
a) PeoplePickerWildcards – To detect your custom provider
b) connectionStrings
c) membership
d) roleManager

Note : Don’t change MachineKey.


Repeat above configuration changes for Forms Based Web Application’s (created in step 5) configuration file (web.config)
(port number will be different).

The only difference in case of Forms Based Web Application’s config file will be:


<configuration>
<system.web>
<!--Remaining settings-->

<authentication mode="Forms">
<forms loginUrl="/_layouts/login.aspx"
timeout="120"
cookieless="UseCookies"
slidingExpiration="true" />
</authentication>
</system.web>
</configuration>


Changed following 5 settings in Forms based site's config (quick review):
a) PeoplePickerWildcards – To detect your custom provider
b) connectionStrings
c) membership
d) roleManager
e) Authentication – It will be automatically set by STEP 6.


So in total, we have to change 3 configuration files:
a) SharePoint’s Central Administration
b) Web Application with Default zone (Windows) [created in step 4]
c) Web Application with Internet/Extranet zone (Forms) [created in step 5]


8) Change policy for Web Application

Note: Select proper site (from top-right dropdown).

Step:

Central Administration > Application Management > Policy for Web Application

Click Add Users (top-left) to add new users/roles. Assign permission as per requirement.
Common Error: Access Denied

Steps to solve above error :

a) Go to --- SharePoint Central Administration > Application Management > Policy for Web Application
b) Select proper Web Application (from top-right)
c) Click "Add User" (top-left)
d) Add required User or Role in it.
e) Grant it "Full Control" (as per requirement) out of following options:
• Full Control - Has full control.
• Full Read - Has full read-only access.
• Deny Write - Has no write access.
• Deny All - Has no access.


9) Add users/roles as site administrator (Primary and Secondary)

Note: Select proper site (from top-right dropdown).

Step:

Central Administration > Application Management > Site Collection Owners


10) Open Forms based URL in browser; it will redirect you to login page

It means site is properly configured for Forms Based Authentication (FBA).

Enter the <Username> and <Password> (refer step 3) in login page; if you are able to login, its mean database is properly configured.
Otherwise check username, password, roles in DB and also the effective permissions of NT AUTHORITY\NETWORK SERVICE.


References:
1. simple-talk FBA

2. msdn FBA

3. codeproject FBA

4. hiddensharepointfeatures FBA

Wednesday, June 10, 2009

Sharepoint Tips n Tricks

1) Export Spreadsheet menu is not visible in Forms Based application in SharePoint:

Solution: Go tO -


Central Administration > Application Management >
Authentication Providers > Edit Authentication


Checked "Yes" in "Enable Client Integration? "


Notes: Client Integration
Disabling client integration will remove features which launch client applications. Some authentication mechanisms (such as Forms) don't work well with client applications. In this configuration, users will have to work on documents locally and upload their changes.


2) Apply validation controls on SharePoint's DateTimeControl

Following code snippet displays, how to apply following validations on Sharepoint's DateTimeControl:
a) Required field validation
b) Valid date validation
c) Date compare validation


<table cellpadding="0" cellspacing="0" style="font-size: 8pt; font-family: Tahoma;">
<tr>
<td>
<SharePoint:DateTimeControl ID="dateTimeStartDate" runat="server"
DateOnly="true"></SharePoint:DateTimeControl>
</td>
<td></td>
</tr>
<tr>
<td>
<SharePoint:DateTimeControl ID="dateTimeEndDate" runat="server"
DateOnly="true"></SharePoint:DateTimeControl>
</td>
<td>
<asp:RequiredFieldValidator ID="RequiredFieldValidator5" runat="server"
ControlToValidate="dateTimeEndDate$dateTimeEndDateDate"
ErrorMessage="* Required value"
Display="Dynamic"></asp:RequiredFieldValidator>

<asp:CompareValidator ID="CompareValidator2" runat="server"
ForeColor="Red"
ControlToValidate="dateTimeEndDate$dateTimeEndDateDate" Type="Date"
Operator="DataTypeCheck" ErrorMessage="* Please enter an valid date."
Display="Dynamic"></asp:CompareValidator>

<asp:CompareValidator ID="valDate" runat="server" ForeColor="Red"
ControlToValidate="dateTimeEndDate$dateTimeEndDateDate"
ControlToCompare="dateTimeStartDate$dateTimeStartDateDate" Type="Date"
Operator="GreaterThanEqual"
ErrorMessage="* Please enter End Date Greater or Equal to Start Date."
Display="Dynamic"></asp:CompareValidator>
</td>
</tr>
</table>


3) Access denied issue for Forms based user

I did following thing to solve "Access Denied" issue in "Forms Based configuration" ---

Go to :
1) Central Administration > Application Management > Policy for Web Application
2) Select proper Web Application (from top-right)
3) Click "Add User" (top-left)
4) Add required User or Role in it.
5) Grant it "Full Control" (as per requirement).

Available options:
[
Full Control - Has full control.
Full Read - Has full read-only access.
Deny Write - Has no write access.
Deny All - Has no access.
]

Then its work fine for me !!!


4) Operation with SPCoulmn Type - SPFieldChoice

Following code snippet retrieves the values stored in a SPColumn.
You can used these values to populated either Dropdown or Listbox as per you requirement.


SPList list = oWebsite.Lists["SPList_Name"];
SPFieldChoice choice = (SPFieldChoice)list.Fields["Event Name"];

foreach(string s in choice.Choices)
Response.Write(s);


5) Open SharePoint page in edit-mode

There are basically two ways to open a sharepoint page in edit-mode
a) Go to Site Actions (Top-Right) and then selecte Edit page.
b) Append the query string of current page with ?toolpaneview=2
e.g. http://myserver.default.aspx?toolpaneview=2


6) Access AppSettings in SharePoint


//Web config entry
<appSettings>
<add key="UpdateTime" value="300" />
</appSettings>


//C# code to access appsetting
System.Configuration.ConfigurationSettings.AppSettings["UpdateTime"].ToString();

//or new way
System.Configuration.ConfigurationManager.AppSettings["UpdateTime"].ToString();


7) RichTextbox or InputFormTextBox in SharePoint
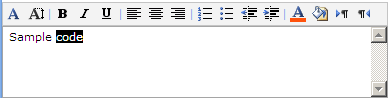


//C# code
InputFormTextBox body = new InputFormTextBox();
body.RichText = true;
body.RichTextMode = Microsoft.SharePoint.SPRichTextMode.Compatible;
body.Rows = 5;
body.TextMode = TextBoxMode.MultiLine;
body.Width = new Unit(300);

this.Controls.Add(body);


Reference--
sharepoint-using-the-rich-text-box-in-a-custom-user-control


8) Session usage in SharePoint

To enable session in your SharePoint pages, open you web application web.config file.

a) Search HttpModule in cofig file, uncomment the following code -

<add name="Session" type="System.Web.SessionState.SessionStateModule" />

b) If session still doesn't work, then set EnableSessionState property to true in page directive.


After enabling the session, if you face some error like...

unable to serialize the session state. in 'stateserver' and 'sqlserver' mode asp.net

Then again open you web.config file and delete following line...

<sessionState mode="StateServer" timeout="60" allowCustomSqlDatabase="true"
partitionResolverType=
"Microsoft.Office.Server.Administration.SqlSessionStateResolver,
Microsoft.Office.Server, Version=12.0.0.0, Culture=neutral,
PublicKeyToken=71e9bce111e9429c" />


9) User Profile in SharePoint


SPSite mySite = SPControl.GetContextSite(Context);
SPWeb myWeb = SPControl.GetContextWeb(Context);
ServerContext context = ServerContext.GetContext(mySite);
UserProfileManager myProfileManager = new UserProfileManager(context);
string CurrentUser = SPContext.Current.Web.CurrentUser.LoginName;
UserProfile myProfile = myProfileManager.GetUserProfile(CurrentUser);

if (myProfile[PropertyConstants.WorkEmail].Value != null)
{
oLabelWorkEmail.Text = myProfile[PropertyConstants.WorkEmail].Value.ToString();
}


References:
How to retrieve current user profile properties
MSDN Forum


10) Run the code with Elevated Privileges

While excuting the code if we face some Privilege or Access issue, then to solve this we can either use SPSecurity.RunWithElevatedPrivileges OR UserToken.

Check following code snippets...


try
{
// Get the Site ID before entering RunWithElevated...
Guid siteID = SPContext.Current.Site.ID;

SPSecurity.RunWithElevatedPrivileges(delegate()
{
using (SPSite site = new SPSite(siteID))
{
// Your code logic here,
//without calling SPContext anywhere inside this method...
}
});
}
catch (SPException spex)
{
//Log exception
}


Note - It is very important to not call the SPContext from within any elevated method, as it'll result in your elevated privileges to cease.


SPUserToken sysToken = SPContext.Current.Site.SystemAccount.UserToken;

using (var spSite = new SPSite(SPContext.Current.Site.ID, sysToken))
{
using (var spWeb = spSite.OpenWeb(SPContext.Current.Web.ID))
{
//Your code
}
}

How to use LINQ in SharePoint

LINQ : Language Integrated Query

If you are writing in-line server code (C# and HTML code in same ASPX file), then you have to follow next 2 steps:

1) Page level directive


<%@ Assembly Name="System.Core, Version=3.5.0.0, Culture=neutral,
PublicKeyToken=B77A5C561934E089" %>
<%@ Import Namespace="System.Linq" %>
<%@ Import Namespace="System.Collections.Generic" %>


2) Modify application's web.config file
Add following lines just below </system.Web> node


</system.web><!-- Reference point -->

<system.codedom>
<compilers>
<compiler language="c#;cs;csharp" extension=".cs" warningLevel="4"
type="Microsoft.CSharp.CSharpCodeProvider, System, Version=2.0.0.0,
Culture=neutral, PublicKeyToken=b77a5c561934e089">
<providerOption name="CompilerVersion" value="v3.5"/>
<providerOption name="WarnAsError" value="false"/>
</compiler>
<compiler language="vb;vbs;visualbasic;vbscript" extension=".vb"
warningLevel="4" type="Microsoft.VisualBasic.VBCodeProvider, System,
Version=2.0.0.0, Culture=neutral, PublicKeyToken=b77a5c561934e089">
<providerOption name="CompilerVersion" value="v3.5"/>
<providerOption name="OptionInfer" value="true"/>
<providerOption name="WarnAsError" value="false"/>
</compiler>
</compilers>
</system.codedom>


3) LINQ code

If you writing C# in seperate file (Code-behind) then you can skip first two steps.


SPList oList;
//To get a particular SPView specific SPListItems
SPView spView = oList.Views["MySPView_Name"];
SPListItemCollection itemCollec = oList.GetItems(spView);


if (itemCollec != null)
{
//You can also run following query directly
//over SPList (by replacing itemColle with oList)
List<SPListItem> items
= (from spLItem in itemCollec.OfType<SPListItem>()
where spLItem["Employee Name"] != null
&& Convert.ToString(spLItem["Employee Name"]) == "Avi"
select spLItem).ToList<SPListItem>();

//Write total items count
Response.Write(items.Count);

//To get individual SPListItem you can either use
//Foreach iteration or indexer e.g. items[i]
}


References:

1) SharePoint Development with LINQ
2) Use Linq inside ...
3) Using LINQ to query a SharePoint List
4) Linq in Sharepoint and querying listitems

How to write Server-side ( C# ) code in SharePoint custom pages

There are basically two approaches to write server side code:
A) Inline coding ( C# and HTML code in same ASPX page)
B) Code-Behind (C# and HTML code in seperate files)

A) Inline coding

1) In this approach, first you have to modify application's web.cofig file.
Locate PageParserPaths node in config file and then change it as per your requirement.

If you doesn't know page(s) name which is(are) using server side code, then write /* in VirtualParth attribute,
else write page name as /pagename.aspx in VirtualParth attribute.
[For each page add a seperate PageParserPath node,
for example you want to allow server side code in 5 pages then you have to add PageParserPath nodes.]


<PageParserPaths>
<PageParserPath VirtualPath="/*" CompilationMode="Always"
AllowServerSideScript="true" />
</PageParserPaths>


2) Write server side code as


<script runat="server">

protected void Page_Load(Object sender, EventArgs e)
{
Response.Write("Server code");
}

</script>


B) Code-Behind approach

1) Create a C# file (or VB file) for your server code


using System;
using System.Collections.Generic;
using System.Linq;
using System.Text;

namespace MyNameSPace
{
public class MyClass : Microsoft.SharePoint.WebControls.LayoutsPageBase
{
//Server control declarations
protected Label lblMessage;

protected void Page_Load(Object sender, EventArgs e)
{
lblMessage.Text = "Server Code";
}
}
}


Points to remember:
- Inherits the class with LayoutsPageBase (there are other options also available for choosing base class)
- Declare ASP.Net server control with protected modifier.


2) Register the DLL (that contains above class) in GAC.

3) safecontrol entry in application's web.config file.

4) Create ASPX file for HTML code


<%@ Assembly Name="MyNameSPace, Version=1.0.0.0, Culture=neutral,
PublicKeyToken=bf118dafb4e11f4b" %>
<%@ Page Language="C#" MasterPageFile="~masterurl/default.master"
Inherits="MyNameSPace.MyClass" %>

<asp:Content ID="Content1" ContentPlaceHolderID="PlaceHolderMain" runat="server">
<asp:Label runat="server" ID="lblMessage" ForeColor="Red"
Visible="false"></asp:Label>
</asp:Content>


Points to remember:
- Specify assembly reference of class created in step 1 (with proper Name, Version, Culture and PublicKeyToken)
- In case of Master-Content page scenario specify MasterPageFile attribute in Page directive
- Specify Inherits attribute in Page directive with proper NameSpace and Class name (e.g. Inherits="MyNameSPace.MyClass" )
- Write ASP.Net server control(s) that we have declared in Step 1 (with protected modifier)


Pros n Cons

Inline
- Easy to deploy, no need to do DLL registration in GAC, IISRESET and safecontrol entry in web.config
- It is unsafe, to allow server side code by modifying PageParserPaths node in web.cofig
- Can't debug the page [Major disadvantage while development].
- In case of any change(s) in code (HTML + C#), replace the existing ASPX file with modified one in SharePoint Designer.


Code-Behind
- Can debug server side code ( Debug -> Attach to Process -> w3wp.exe process )
- Need to do DLL registration in GAC, IISRESET and safecontrol entry in web.config
- It's safer to use compare to inline code
- In case of any change(s) in HTML code, replace the existing ASPX file with modified one in SharePoint Designer.
- In case of any change(s) in server-side ( C# ) code, re-register the DLL in GAC (drag-n-drop dll in assembly folder) and do IISRESET [ Must ] to see the change(s).

Tuesday, May 12, 2009

ASP.Net Tips n Tricks

1) Get the full file path (with name) in ASP.Net's FileUpload control.

FileUpload1.PostedFile.FileName returns full file path (including file name),
FileUpload1.FileName returns only file name.

2) Password Validation

Following code snippet display password validation at Client side (JavaScript).
Here password must contains Non-AlphaNumeric character(s) and length should be greater than 6.


<asp:TextBox ID="txtPassword" runat="server" Width="270px"
Enabled="true"></asp:TextBox>
<asp:CustomValidator ID="valPasswd" runat="server"
ControlToValidate="txtPassword" ClientValidationFunction="validatePassword"
Display="Dynamic"
ErrorMessage="* Inadequate password strength."></asp:CustomValidator>

<script type="text/javascript">

function validatePassword(oSrc,args)
{
var isValid = false;

var regExp = /\W/; // /[^a-zA-Z0-9]/;
if( (regExp.test(args.Value)) && (args.Value.length > 6) )
isValid = true;

args.IsValid = isValid;
}

</script>


3) How to get GridView's RowIndex (current row index) in GridView's RowCommand event:

There are two ways to find rowindex, as per me second is comparatively good one
because we need not to do control.Parent.Parent


int rowIndex
= ((GridViewRow)((Control)e.CommandSource).Parent.Parent).RowIndex;

int rowIndex
= ((GridViewRow)((Control)e.CommandSource).NamingContainer).RowIndex;


4) How to search a particular object in a Generic List:

Consider we have a generic list that holds an organization's employees objects,
and we find to a particular employee object based on some input like employee ID.
Here is the code:


List employees = ""; //Logic to fill employees list.
//Search a particular employee based on employee code
//[Here EmployeeCode is one of the variable or properties in Employee class]
Employee employee = employees.Find(delegate(Employee emp)
{ return emp.EmployeeCode == inputValue; });


5) How to find control(s) in ASP.Net GridView's EmptyDataTemplate?

If we are using ASP.Net GridView for displaying records, then to display GridView with no record we have to use EmptyDataTemplate. Inside that we will write all our required controls.

Consider a case... in which EmptyDataTemplate contains a textbox and a button.
If we click button, then GridView's OnRowCommand event will fire.

In GridView_OnRowCommand method to get textbox control we can follow one of the following approaches:


//Approach 1
TextBox txt
= (TextBox)gridviewSP.Controls[0].Controls[0].Controls[0].Controls[1];

//Approach 2
GridViewRow row
= (GridViewRow)((ImageButton)e.CommandSource).NamingContainer;
TextBox txt = row.FindControl("txtName");


As per me second approach is good one, because we need to do blind control search.

In second approach first we are getting GridViewRow, that contains textbox and button. Then in that GridViewRow, with FindControl function find our required textbox.


6) ASP.Net's GridView sorting logic


//C# code

//Call to get GridView's SortOrder and SortExpression...
string sortExpression = e.SortExpression;
bool sorting = GetSortDirection(sortExpression) == "ASC" ? true : false;
.
.


.
.
/// <summary>
/// Gets sort direction for gridview sorting
/// </summary>
/// <param name="column"></param>
/// <returns></returns>
string GetSortDirection(string column)
{
// By default, set the sort direction to ascending.
string sortDirection = "ASC";

// Retrieve the last column that was sorted.
string sortExpression = ViewState["SortExpression"] as string;

if (sortExpression != null)
{
// Check if the same column is being sorted.
// Otherwise, the default value can be returned.
if (sortExpression == column)
{
string lastDirection = ViewState["SortDirection"] as string;
if ((lastDirection != null) && (lastDirection == "ASC"))
{
sortDirection = "DESC";
}
}
}

// Save new values in ViewState.
ViewState["SortDirection"] = sortDirection;
ViewState["SortExpression"] = column;

return sortDirection;
}


7) Operation related to ASP.Net's TextBox with TextMode set to Password :
If we set the TextMode property of ASP:TextBox to Password, then we can't directly access the Text property of TextBox after page postback. Its a known issue and one of the solution is to use Attributes of textbox. We can set the TextBox's Attributes in TextBox_PreRender event and consume its value anywhere we want by using the stored value in Attributes.


<!-- HTML code -->
<asp:TextBox ID="TextBoxPassword" OnPreRender="TextBoxPassword_PreRender"
TextMode="Password" runat="server" Width="150px"></asp:TextBox>


//C# code

protected void TextBoxPassword_PreRender(object sender, EventArgs e)
{
TextBoxPassword.Attributes.Add("value", TextBoxPassword.Text);
}

protected void ButtonAddUser_Click(object sender, EventArgs e)
{
String password = TextBoxPassword.Attributes["value"];
}


8) Operation related to ASP.Net's GridView and DataTable :
This section covers DataTable and its usage in ASP:GridView, especially the Primary Key column and Find functionality of DataTable. [Code are self-explainatory with comments]


//C# code

protected void Page_Load(object sender, EventArgs e)
{
if (!Page.IsPostBack)
{
//Get the DataTable instance and store it
//in ViewState to be used later on.
if (ViewState["EmpDataTable"] == null)
{
ViewState["EmpDataTable"] = CreateDataTable();
}

dataTableEmps = (DataTable)ViewState["EmpDataTable"];

//Set the DataSource and Bind the Grid
GridViewEmps.DataSource = dataTableEmps;
GridViewEmps.DataBind();
}
}


//Create and return a DataTable and its schema.
DataTable CreateDataTable()
{
//Create a DataTable, then add two Columns in it.
DataTable dataTable = new DataTable("Employeess");

dataTable.Columns.Add("EmployeeName", Type.GetType("System.String"));

DataColumn primaryColumn
= new DataColumn("EmployeeID", Type.GetType("System.String"));
dataTable.Columns.Add(primaryColumn);

//Set the PrimaryKey in DataTable
//(to be used in Find functionality of DataTable)
primaryColumn.Unique = true;
dataTable.PrimaryKey = new DataColumn[] { primaryColumn };

return dataTable;
}

//GridView's OnRowDeleting event
protected void GridViewEmps_RowDeleting(object sender
, GridViewDeleteEventArgs e)
{
//Get the control value
string empID
= ((Label)GridViewEmps.Rows[e.RowIndex]
.FindControl("LabelGridViewEmpID")).Text;

//Get the DataTable instance
if (ViewState["EmpDataTable "] == null)
ViewState["EmpDataTable "] = CreateDataTable();
else
dataTableEmps = (DataTable)ViewState["EmpDataTable "];

//Find the row, which we want to delete.
//Only pass the value of Primary key column.
DataRow row = dataTableEmps.Rows.Find(empID);

dataTableEmps.Rows.Remove(row);
GridViewEmps.DataSource = dataTableEmps;
GridViewEmps.DataBind();
}


<!-- HTML code -->
<asp:GridView ID="GridViewEmps" runat="server"
AutoGenerateColumns="false"
OnRowDeleting="GridViewEmps_RowDeleting">
<Columns>
<asp:TemplateField HeaderText="Name">
<ItemTemplate>
<asp:Label ID="LabelGridViewEmpName" runat="server"
Text='<%# Bind("EmployeeName") %>'></asp:Label>
</ItemTemplate>
</asp:TemplateField>
<asp:TemplateField HeaderText="LoginName" Visible="false">
<ItemTemplate>
<asp:Label ID="LabelGridViewEmpID" runat="server"
Text='<%# Bind("EmployeeID") %>'></asp:Label>
</ItemTemplate>
</asp:TemplateField>
</Columns>
</asp:GridView>


9) Function to convert a image/text file into byte array

private byte [] StreamFile(string filename)
{
FileStream fs = new FileStream(filename, FileMode.Open,FileAccess.Read);

// Create a byte array of file stream length
byte[] dataArray = new byte[fs.Length];

//Read block of bytes from stream into the byte array
fs.Read(dataArray,0,System.Convert.ToInt32(fs.Length));

//Close the File Stream
fs.Close();
return dataArray; //return the byte data
}


10) Code to add a new XmlNode / XmlElement in XmlDocument:

string strFilename = "Employees.xml";
XmlDocument xmlDoc = new XmlDocument();

if (File.Exists(strFilename))
{
xmlDoc.Load(strFilename);

XmlElement xElement = xmlDoc.CreateElement("Employee");
string strNewEmployee = "<ID>9</ID>" +
"<Name>Avi</Name>" +
"<Age>25</Age>";

xElement.InnerXml = strNewEmployee;
xmlDoc.DocumentElement.AppendChild(xElement);

xmlDoc.Save("Employees.xml");
}

Google